2026-02-11
How to Add Subtitles to Videos A Creator's Practical Guide
There are really three ways to get subtitles on your videos: you can let fast AI transcription tools do the heavy lifting, create the subtitle file yourself for total control, or just use the built-in editors on platforms like . For most people, AI is the clear winner—it's the quickest way to get from a finished video to accurate captions, often in just a few minutes.
Why Your Videos Need Subtitles Right Now
Before we jump into the step-by-step, let's talk about why this is so important. Adding subtitles isn't just a small tweak anymore; it's a strategic move that seriously impacts how many people see your video, how much they engage with it, and how effective it is overall. Think of it less like a chore and more like a powerful upgrade for your content.
The market data backs this up. The global captioning and subtitling industry was valued at around USD 351.16 million in 2024 and is expected to nearly double by 2033. This explosion is driven by a massive 572% jump in caption usage since 2021, which tells you one thing loud and clear: viewers now expect them. If you want to dive deeper, you can .
To put the core benefits in perspective, here's a quick summary of how subtitles can transform your content's performance.
The Impact of Subtitles At a Glance
| Benefit | Description | Key Impact |
|---|---|---|
| Accessibility | Makes content understandable for the deaf and hard-of-hearing community and in sound-off environments. | Drastically expands your potential audience by removing hearing and environmental barriers. |
| Engagement | Reinforces the message, improving comprehension and viewer focus, which leads to longer watch times. | Higher retention signals to algorithms that your content is valuable, boosting its visibility. |
| SEO | Provides a full text transcript for search engines to crawl, indexing every word spoken in your video. | Your video can rank for countless long-tail keywords, driving significant organic traffic. |
As you can see, subtitles are a powerhouse, hitting on everything from inclusivity to raw performance metrics. Let's break down each of these benefits a bit more.
Expanding Your Audience Through Accessibility
The most obvious win here is making your content accessible to the deaf and hard-of-hearing community. That alone is a huge reason to do it. But "accessibility" today means so much more than that.
Think about how people actually watch videos now:
- On a noisy bus or in a crowded coffee shop.
- In a quiet office or library where they can't turn the sound on.
- Scrolling through social media feeds where videos autoplay on mute.
In any of these everyday situations, your message is completely lost without subtitles. Captions make sure your content works no matter where your viewer is or what their hearing ability is.
"Subtitles bridge the gap between your message and a viewer's environment. They turn a muted, inaccessible video into an engaging experience, ensuring no part of your audience is left behind."
Boosting Engagement and Comprehension
Subtitles don't just make videos watchable; they pull people in. When someone can read along, it locks in the information you're sharing, making it easier to understand and remember. This is a game-changer for tutorials, educational videos, or content where the speaker has an accent.
This focus almost always leads to higher watch times. Viewers who would have bounced from a video they couldn't hear are much more likely to stick around. On a platform like YouTube, better audience retention is a massive signal to the algorithm that your video is worth recommending to more people.
Unlocking Powerful SEO Benefits
This is the one most creators miss. Search engines can't "watch" your video to figure out what it's about. They rely entirely on text—your title, description, and tags.
When you upload a subtitle file (like an SRT or VTT), you’re handing Google a complete, word-for-word transcript of your entire video. Suddenly, every keyword and phrase you mentioned becomes searchable. This helps your video rank for a much wider variety of search terms, driving more organic traffic and helping new viewers discover your content.
The Fastest Way to Add Subtitles with AI
Let’s be honest, manually transcribing and timing subtitles is a grind. If you’re a busy creator juggling a YouTube channel, a weekly podcast, or a series of online courses, you simply don’t have hours to burn on that. This is where AI tools have completely changed the game, shrinking a tedious task that used to take half a day into a quick five-minute job.
The demand for this isn't just a niche trend; it's exploding. The market for live captioning is set to hit a massive USD 2,693.95 million by 2035, and the overall subtitle market is already on a path to USD 1.13 billion. This isn't just industry jargon—it shows that automated tools are quickly becoming the standard for anyone who wants their content to be accessible and seen.
Getting Started with AI Transcription
The magic behind AI subtitling is pretty straightforward. You give the tool your video, and a smart algorithm listens to the audio, spitting back a text transcript complete with timecodes. Platforms like Kopia.ai have made this process so smooth that you can get up to 99% accuracy on clear audio in just a few clicks.
Here's how it usually works:
- Upload your video: Just drag and drop your MP4, MOV, or other video file right into the browser.
- Pick the language: Tell the AI what language is being spoken in the video so it knows what to listen for. Good tools support dozens of languages.
- Generate the transcript: Hit the button, and the AI does its thing. A 10-minute video is often transcribed in under a minute.
What you get is a full script, with every word timestamped. This becomes the raw material for your subtitles, ready for a quick polish. If you want to see exactly how this works, you can check out our to get a feel for the process.
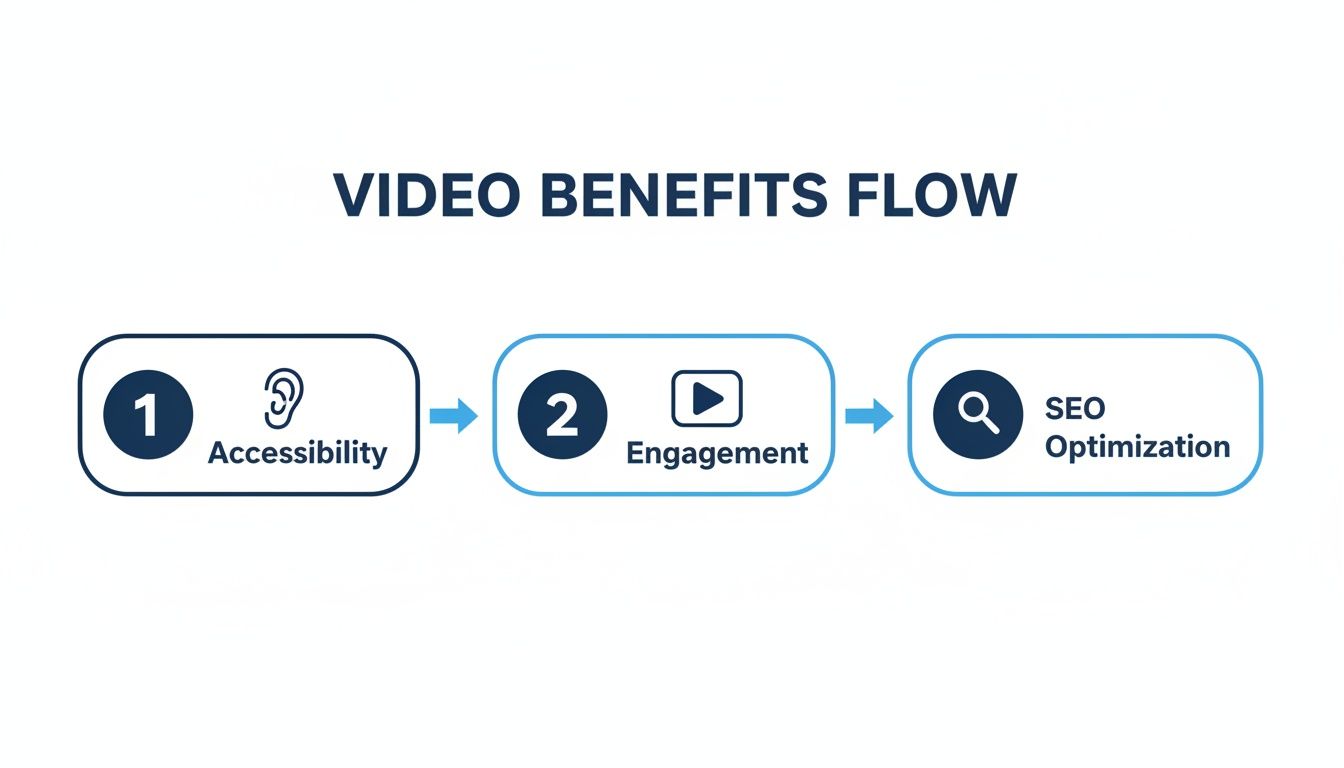
This infographic really nails down why this effort—whether you use AI or do it manually—is such a huge win for your content.
As you can see, it’s not just about one thing. Subtitles boost your content across the board: better accessibility, higher engagement, and stronger SEO. It’s a powerful triple threat.
Polishing Your AI-Generated Subtitles
Even the smartest AI isn't perfect. It might bungle a unique name, stumble over technical terms, or get confused by a little background noise. That’s why a quick review is always a good idea, but modern tools make this part painless.
Forget about endlessly scrubbing through the timeline to find one tiny mistake. The best editors, like the one in Kopia.ai, sync the transcript to the video word-by-word.
The real breakthrough with a good AI tool is the ability to click any word in the transcript and have the video jump right to that spot. This turns editing from a frustrating treasure hunt into a fast, targeted fix.
This interactive design means you can spot and fix errors in seconds. Did the AI write "their" when you said "there"? Just find the word, click it to hear the original audio, and type in the correction. It’s a brilliant way to get to 100% accuracy without the old-school headache of manual timing.
Exporting Your Subtitle Files
Once your transcript is perfect, you have a couple of ways to get your subtitles onto your video. The right choice really just depends on where you plan to post it.
1. Export a Subtitle File (SRT or VTT)
This is the classic approach for platforms like YouTube and Vimeo. You export the subtitles as a separate text file, usually in SRT or VTT format. These little files contain all your text, neatly packaged with the precise start and end times for each line.
You upload this file with your video, and the platform displays them as closed captions (CC). This is the best option for a few key reasons:
- It’s great for SEO: Search engine bots can read the text in your SRT file, which helps your video show up in search results.
- Viewers are in control: They can toggle the captions on or off to suit their preference.
- It supports multiple languages: You can upload different SRT files for different languages, making your video globally accessible.
2. Burn Subtitles Directly into the Video
The other option is to "burn" the subtitles right into the video itself. This makes them a permanent part of the video frames, creating what are known as open captions. They’re always visible and can't be turned off.
This is the way to go for social media, where videos autoplay on mute. Think about platforms like:
- Instagram Reels
- TikTok
- LinkedIn and Facebook feeds
By burning the captions in, you grab a viewer's attention immediately—even before they decide to turn the sound on. Most tools let you customize the font, size, and color of these captions, so you can make them pop and keep them consistent with your brand. It’s a simple trick to make your videos far more effective in a noisy social feed.
A Practical Guide to Manual Subtitling
While AI transcription is a massive time-saver, sometimes you just need that human touch. You might be dealing with tricky audio, want a specific creative flair, or just need to clean up an AI-generated script. This is where manual subtitling comes in, giving you complete control over every single word and pause.
Don't worry, "manual" doesn't mean complicated. It’s less about being a tech wizard and more about having a good ear and an eye for detail. Most modern tools make the process surprisingly straightforward.
At its core, the workflow is simple: you listen to a bit of audio, type what you hear, and then tell the software when that text should appear and disappear. You just repeat that cycle until your entire video is subtitled and perfectly synced.
Choosing Your Manual Subtitling Tool
You've got a couple of great options for creating subtitles by hand, and the best one really depends on your project and where your video will end up.
-
Dedicated Subtitle Editors: For the ultimate in precision, a free tool like Aegisub is the gold standard. It gives you a detailed view of the audio waveform, which makes it incredibly easy to pinpoint the exact start and end of a spoken phrase. This is the go-to for creators who need granular control before uploading their video.
-
Platform-Based Editors: If your video is going straight to YouTube, you can't beat the convenience of the built-in editor in . It has a fantastic feature that automatically pauses the video as you type, which makes the whole process feel really smooth and intuitive.
No matter which tool you choose, the fundamental principles are the same. The buttons might look different, but the job—typing, timing, and syncing—remains universal.
Mastering Timestamps and Syncing
The real magic of manual subtitling lies in the timestamp. It's a small piece of code that tells the video player exactly when to show a line of text and when to take it away. In an SRT file (the most common format), a timestamp looks like this: Hours:Minutes:Seconds,Milliseconds.
For instance, a line like 00:00:15,320 --> 00:00:18,100 instructs the player to display the subtitle at 15.320 seconds and hide it at 18.100 seconds.
Nailing this timing is what makes subtitles feel professional instead of distracting. The goal is for the text to pop up right as someone starts speaking and vanish just after they finish.
Pro Tip: Avoid syncing subtitles word-for-word like you're at a karaoke bar. It's much better to capture complete thoughts or phrases in each subtitle block. This gives your audience time to actually read and understand the message without feeling rushed.
Best Practices for Readability
How your text looks on screen is just as crucial as its timing. Even perfectly synced subtitles can be a pain to read if they're not formatted well.
As you're learning how to add subtitles to videos, keep these simple guidelines in mind:
-
Break Up Long Sentences: Nobody wants to read a wall of text. A great rule of thumb is to stick to one or two lines per subtitle. If someone says a long sentence, find a natural pause—like after a comma—and split it into two separate, timed subtitles.
-
Mind Your Character Count: Try to keep each line under 42 characters. This ensures your text is easy to scan on any device, from a huge TV screen to a tiny phone. Most subtitle editors have a built-in character counter to help you out.
-
Give People Time to Read: Make sure a subtitle stays on screen long enough to be read comfortably. A good starting point is one second of screen time for every three or four words. If someone speaks really fast, you might need to leave the subtitle on screen for a split second after they've finished talking. It’s a small tweak that makes a world of difference for the viewer.
Getting Your Subtitles on the Screen

You’ve done the hard part—your subtitle file is polished and ready to go. But an SRT or VTT file sitting on your desktop won’t help anyone. The final step is pairing it with your video on the platforms where your audience actually hangs out.
This process is usually pretty straightforward, but every platform has its own little quirks. The good news is that they all want their content to be more accessible, so the upload options are generally easy to find.
Platform-Specific Upload Guides
Let's walk through how to add your subtitle file on the major video and social platforms. The exact menu names might shift over time, but the basic workflow is always the same: find your video, look for an "edit" or "details" option, and then find the "subtitles" or "captions" section.
Here’s a quick rundown for the big players:
-
YouTube: Inside YouTube Studio, navigate to the video you want to edit. Find the "Subtitles" tab on the left-hand menu. From there, you'll click "Add Language," pick your language, and then hit "Add" under the subtitles column. This brings up an option to "Upload file," where you can grab your SRT or VTT.
-
Vimeo: Head to your video's settings page and choose the "Captions and audio" option. It’s a clean interface that lets you upload your subtitle file directly and manage multiple language files all in one place.
-
Facebook & LinkedIn: On these platforms, you handle this during the video upload process. Once you’ve selected your video file, look for an "Edit" or "Video options" button. You’ll see a prompt to upload a caption file, which is almost always the SRT format.
This simple upload is what finally unlocks all the accessibility and SEO benefits you've been working toward.
Open Captions vs. Closed Captions
As you learn how to add subtitles to videos, you'll constantly run into two terms: open captions and closed captions. They might sound similar, but they serve very different functions, and knowing when to use each is crucial for your video's performance.
Closed Captions (CC) are the subtitles you upload as a separate file (like that SRT you made). The power is in the viewer's hands—they can turn them on or off with a click. This is the gold standard for platforms like YouTube and Vimeo because it offers viewer flexibility and is fantastic for SEO.
Open Captions, on the other hand, are "burned" right into the video frames. They become a permanent part of the image and can't be turned off. This is your best bet for social media feeds where videos often autoplay on mute, like on Instagram, TikTok, or Facebook. They guarantee your message gets across instantly, even without sound.
For a bulletproof strategy, I always recommend creating two versions of your video: one with burned-in captions for social media and another clean version to use with an SRT file on YouTube. This way, you’re optimized for every environment.
If you need to resize or reformat your video for different social platforms, some can help simplify the process of creating these different versions.
Customizing Your Captions for Brand and Readability
Subtitles don't have to be boring black-and-white text. Many platforms and video editors give you the power to style your captions to match your brand's look and feel. This is especially important for those burned-in (open) captions.
When you're styling, focus on these three things for the biggest impact:
- Font Choice: Stick with a clean, sans-serif font like Arial, Helvetica, or Roboto. You want to avoid any decorative or script fonts that are tough to read, particularly on small mobile screens.
- Size and Placement: The text needs to be large enough to be legible on a phone but not so big that it covers up the important action in your video. A subtle, semi-transparent background box behind the text can really make it pop against a busy background.
- Color and Contrast: High contrast is your friend. White text on a black background is a classic for a reason. If you use your brand colors, just make sure the text has a strong drop shadow or outline so it stays readable no matter what's happening in the video.
Taking a few extra minutes to style your captions is one of those small details that makes your content look far more professional and reinforces your brand's visual identity.
Reaching a Global Audience with Translations
So, you've nailed down accurate subtitles in your video's original language. That’s a huge win for accessibility and SEO. But why stop there? Your content has the power to connect with people all over the world, and translating your subtitles is the ticket to making that happen.
This isn't just about picking up a few extra views. We're talking about tapping into massive, content-hungry markets. Just look at the Asia-Pacific region, where the demand for multilingual subtitles is exploding alongside the boom in digital streaming. While North American accessibility laws drive a big part of the market, the real growth is happening internationally. If you want to dig into the numbers, you can .
The good news? You no longer need to hire expensive translation agencies for every single language. With the right tools, you can take your polished transcript and spin it into dozens of other languages in just a few minutes.
The Power of AI-Driven Translation
Without a doubt, the fastest way to translate your subtitles is with an AI-powered platform. Once you have a clean, accurate subtitle file in your original language, you’ve already done the hardest part. The AI can then use that file as a flawless source for translation.
Tools like Kopia.ai make this ridiculously easy. It’s not some complicated, multi-step headache; it's often just a single click. You can take your verified English transcript and instantly translate it into over 130 different languages.
This completely changes the game for creators who want to scale their reach. The workflow looks something like this:
- Start with Accuracy: First, generate and perfect the subtitles in your video's original language. A perfect source text is absolutely critical for a quality translation.
- Pick Your Languages: Next, just select the languages you want to target. You can generate files for Spanish, French, Hindi, and tons more all at once.
- Generate and Export: The AI spits out a separate, perfectly timed SRT or VTT file for each new language. They're ready to upload immediately.
With this method, you can add five, ten, or even twenty languages to a single video in less time than it used to take to create one from scratch. To see the full list of what's possible, you can check out the .
Managing Multiple Languages on YouTube
has fantastic built-in support for multiple subtitle tracks, which makes it the perfect place to use all your newly translated files.
When you upload different language files to the same video, YouTube automatically detects a viewer's preferred language setting and shows them the right subtitles by default. It just works.
This creates a smooth, localized experience for your international audience. A viewer in Germany will see German subtitles, while someone in Brazil will see Portuguese, all without having to mess with any settings. It makes your content feel like it was made just for them.
By providing subtitles in multiple languages, you're not just translating words; you're signaling to a global audience that your content is for them. This small step can dramatically increase your video's international appeal and watch time.
Quality Control for Nuance and Culture
AI translation has gotten incredibly good, especially for straightforward, informational content. But it's always smart to have a human check the final output, especially if your videos rely on humor, slang, or deep cultural references. An automated tool can translate the words, but it can easily miss the meaning.
For your most important videos or when you're making a big push into a new market, think about having a native speaker give the translated file a quick once-over. They’ll catch awkward phrasing or cultural blunders that an algorithm would miss, ensuring your message lands exactly as you intended. That final polish can be the difference between connecting with a new audience and completely confusing them.
To help you decide which route to take, here’s a quick comparison of the different translation methods.
Subtitle Translation Methods Compared
| Method | Pros | Cons | Best For |
|---|---|---|---|
| AI Translation (e.g., Kopia.ai) | Incredibly fast, cost-effective, supports a massive number of languages, and great for scaling content. | May miss cultural nuance, slang, or humor. Can sometimes produce overly literal translations. | Creators who need to translate a large volume of content quickly and affordably. Ideal for tutorials and informational videos. |
| Manual Translation (DIY) | You have full control over nuance and tone, ensuring perfect accuracy if you're fluent in the language. | Extremely time-consuming. Only feasible if you are a native speaker of the target language. | Bilingual or multilingual creators translating content into their other native languages for a small number of videos. |
| Hiring a Freelance Translator | High accuracy and cultural appropriateness. A human touch catches subtleties AI might miss. | Can be expensive, especially for multiple languages. Finding and vetting translators takes time. | High-stakes content like brand marketing videos, films, or expanding into a primary new market where accuracy is non-negotiable. |
| Community Contributions (e.g., YouTube) | Free! Engages your most dedicated viewers and builds a strong community around your channel. | Unreliable timelines and inconsistent quality. Not all languages will be covered. | Established creators with a large, engaged, and multilingual international audience willing to volunteer their time. |
Choosing the right method really comes down to your budget, timeline, and how crucial perfect cultural nuance is for your specific content. For most creators, a hybrid approach—using AI for speed and a quick human review for quality—offers the best of both worlds.
Answering Your Top Questions About Video Subtitles
Once you start diving into the world of video subtitles, you'll probably run into the same few questions that everyone else does. Getting these sorted out early on will save you a ton of headaches and help you make better choices for your videos.
Let's clear up some of the most common points of confusion, from which file type to use to whether subtitles are really worth the effort for SEO.
SRT vs. VTT: Which File Should I Use?
You’ll see these two acronyms everywhere: SRT and VTT. They're the two main formats for subtitle files, kind of like the .jpg and .png of the text-on-screen world.
SRT (SubRip Text) is the old reliable. It's the most basic and widely supported format out there. An SRT file is just a simple text document with three key components: a number for each caption, a start and end timecode, and the subtitle text itself. Its main advantage is its universal compatibility—nearly every video player, social platform, and editing software will accept it without any issues.
VTT (WebVTT) is the more modern, web-focused option. Think of it as SRT’s more capable younger sibling. It does everything SRT can, but it also supports extra styling like bolding, italics, and even lets you control the position of the text on the screen. This is all handled right inside the VTT file itself.
My two cents: If you just need something that works everywhere, stick with SRT. It's foolproof. But if you're embedding videos on a website and want more control over how your captions look, VTT is the way to go. Thankfully, tools like let you export both, so you don't have to choose just one.
Should I Burn Subtitles In or Use a Separate File?
This is a big one, and there's no single "right" answer. The best choice completely depends on where people are going to be watching your video.
You should use a separate file (which creates closed captions, or CC) when you're publishing on platforms that prioritize user control and searchability. This includes places like:
- YouTube
- Vimeo
- Online course platforms (Teachable, Kajabi, etc.)
With a separate file, viewers can turn the captions on or off, and more importantly, the platform’s search engine can read all that text. That's a huge win for discoverability.
On the other hand, you should burn the subtitles directly into the video file (creating open captions) when you're posting to social media feeds where videos often autoplay on mute. This is the go-to strategy for:
- Instagram Reels and Stories
- TikTok
- Facebook and LinkedIn feeds
On these platforms, your goal is to hook someone scrolling by in just a few seconds. Since over 50% of viewers say they use captions most of the time, burning them in ensures your message gets across, sound or no sound.
How Accurate Are AI Subtitle Generators, Really?
I've been blown away by how good modern AI transcription has become. For clear audio—like a talking-head video or a well-recorded podcast—you can expect up to 99% accuracy. The results are often so good that you only need to make a few tiny tweaks.
But, AI isn't perfect. Its accuracy can drop when you throw it a curveball, such as:
- Loud background noise: Music, coffee shop chatter, or street sounds can confuse the AI.
- Thick accents: While they're getting much better, some regional dialects can still be a challenge.
- Technical jargon: Highly specific terms from fields like medicine or engineering might get transcribed incorrectly.
The best way to think about it is this: AI does 99% of the grunt work for you in minutes. It gives you a fantastic first draft, and your job is to just do a quick final proofread to catch any proper nouns or specific terms it might have missed. A good subtitle editor makes this a breeze.
Do Subtitles Actually Help with Video SEO?
Absolutely, and it's one of the most overlooked benefits of adding captions. Search engines like Google are incredible at reading text, but they can't actually watch your video to understand what it's about.
When you upload a subtitle file alongside your video, you're literally handing the search engine a complete, keyword-rich transcript.
This gives platforms like YouTube and Google a deep understanding of your content. Suddenly, they can rank your video not just for your main title and description, but for every single specific phrase and long-tail keyword you mention in your dialogue. It opens the door to so much more traffic.
Ready to add accurate, stylish subtitles to your videos in minutes? Kopia.ai uses advanced AI to transcribe your content with up to 99% accuracy, offers one-click translation into 130+ languages, and lets you burn captions directly into your video for social media.